How to Measure Stairs for a Dog Gate (Top, Bottom and Banisters)
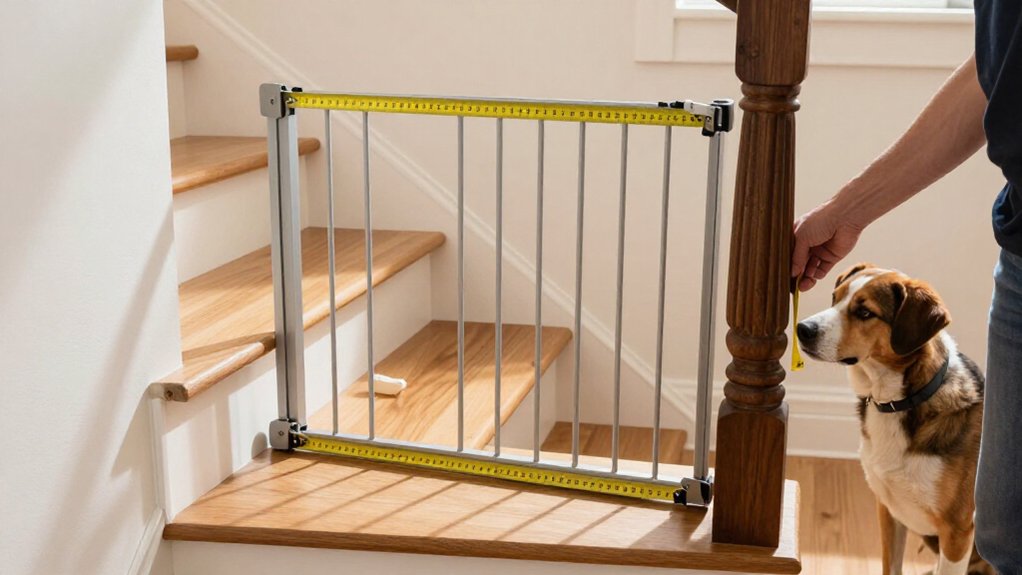
Measure each gate fixing-point span at the upper and lower bracket heights; posts may taper or sit unevenly.
Check the opening at every bracket level, including trim and baseboards, and compare its narrowest width with the gate’s specified range.
At the top landing, position the gate at least 10 inches back from the top step, and confirm safe swing clearance.
Photograph banisters and verify approved brackets fit securely. Recheck attachments after a week.
Next, learn what to check before drilling.
Measure Banisters and Landings
Measure the opening at the exact height where the gate brackets will sit, checking both the upper and lower points if the banisters taper or sit unevenly. For a wall-to-banister opening, measure between the intended attachment points, not the widest surfaces, and include the thickness of any approved adapter. Check each banister for stability and a suitable mounting surface; decorative trim alone won’t provide a secure fixing point.
Photograph both banisters at bracket height from the front and side, then compare their shape and spacing with the gate’s installation diagram. At a top landing, confirm the required setback, mounting position, swing direction, and operating clearance. For the SS-30OD outdoor gate, keep the mounting position at least 3 inches from the first step’s edge, as specified.
Bring a Tape Measure
Once you’ve checked the banisters and landing, use a tape measure to find the opening between the gate’s actual mounting points, not the staircase’s apparent width.
Measure at every bracket height; baseboards, molding, tapered posts or handrail brackets may narrow the span and leave a mismatch.
- For a wall-to-banister opening, measure exactly where brackets will sit.
- Include the thickness of any approved adapter in your span.
- On tapered posts, record upper and lower measurements; don’t assume they’re equal.
- Check that the post and wall are stable where the gate will attach.
Write each measurement down, then compare it with the gate’s manual and mounting diagram before ordering. That check can prevent a poor fit and help keep your dog safer at the stairs.
Step 1: Clear Stairway Obstructions
Clear furniture, toys, and debris from the landing and the gate’s intended swing path so nothing blocks safe passage or operation. Check that handrails, doors, nearby furniture, and stair edges won’t interfere with the gate or prevent its latch from engaging. Remove objects near the barrier that your dog could use to climb over or squeeze around it.
With your dog elsewhere, test the gate’s swing and confirm you’ve got enough standing room to open and close it without stepping onto a stair or twisting. Keep the route clear of wet leaves and debris, which can make the landing slippery or difficult to cross. Check that opening the gate won’t push it against a door or furniture, or leave your dog a foothold nearby.
Step 2: Mark the Top and Bottom Landings
Before fixing the gate’s position, mark its line on the top landing at least 10 inches (25 cm) back from the top step’s tread, or farther if the gate manual requires it. Keep the gate at the top level; don’t set it below the landing or where it could swing over the downward drop.
At the bottom, mark a position that blocks your dog’s access without leaving climbable steps on the dog’s side. For a stair-mounted barrier, use only the top or lowest tread, never the middle of the stairs. Before fixing either mark, check that you have enough standing room on the landing and that the gate’s permitted swing won’t obstruct the stairs or passage. Follow the manufacturer’s mounting and swing instructions to keep each location safe and usable.
Step 3: Measure the Gate Opening
To choose a gate that fits, measure between the actual mounting points at the gate’s intended height, not across the opening’s widest span.
Use a tape measure and record the width at both upper and lower fixing points. Tapered posts, baseboards, molding, or handrail brackets can make these measurements differ. Check the narrowest point; your gate must fit that width and fall within its specified range. For example, the Cumbor 3046 fits openings from 30 to 46 inches.
For a wall-to-banister installation, include the thickness of any manufacturer-approved adapter in your required width calculation. Before ordering, photograph both mounting surfaces from the front and side. Compare their shape, material, and measurements with the manufacturer’s installation diagram. A secure fit protects your dog from falls.
Step 4: Measure Banister-to-Wall Span
Measure the banister-to-wall span at the exact heights where the gate brackets will attach, not at the opening’s widest point. Take one measurement at the upper fixing point and another at the lower one; a tapered or uneven banister can change the span. Note both figures.
If you’ll use a manufacturer-approved banister adapter, include its thickness in the final span, then confirm the adjusted measurement falls within your gate’s stated width range. Photograph the banister and wall at bracket height from the front and side. Check the photos against the gate’s installation diagram to verify the mounting surfaces. Use only an adapter approved for your exact gate and banister shape. A scratch-protection strap or decorative trim may look suitable, but it isn’t necessarily a secure, load-bearing fixing. Follow the manufacturer’s instructions before installing the gate.
Step 5: Note Baseboard and Trim Clearance
Even after checking the banister-to-wall span, account for baseboards and trim that can change the opening width. Measure where the gate’s brackets will sit, rather than relying on the widest wall-to-wall measurement. Check the opening at each proposed attachment height; a baseboard may narrow the space near the floor. For a wall-to-banister fit, measure at the bracket positions and include the thickness of any manufacturer-approved adapter in your final span.
Confirm that the mounting brackets clear the baseboard. Use only an adapter approved for your exact gate and installation; an unapproved spacer can undermine a secure fit. If molding or trim prevents stable contact, don’t treat it as a fixing point. Follow the manufacturer’s surface instructions, or get qualified help before installing the gate.
Step 6: Photograph Bracket Locations
Before choosing hardware, photograph both proposed mounting points at bracket height, including the surrounding wall, railing, or banister. Take front and side views of each post so you can see its shape, any taper, and the flat surface available for mounting. Keep baseboards, decorative molding, and nearby handrails in the frame; these features can limit bracket placement or gate clearance.
Measure the opening at both the upper and lower bracket positions, and record each width beside the corresponding photos. Tapered posts may make those measurements differ, so don’t assume the opening is uniform. Compare your pictures and measurements with the exact gate’s mounting diagram before selecting brackets. If the post shape doesn’t match the diagram, ask the manufacturer whether you need an approved adapter. Use clear photos and accurate dimensions to help guarantee a secure installation.
Test the Gate Swing
Once you’ve checked the mounting points, confirm the gate’s permitted swing direction in its manual and position it so it can’t swing out over a drop. Before you drill, mark the proposed gate position and swing path. Check that the panel and latch clear walls, rails, furniture, and steps.
Stand where you’ll operate the latch; you need room to do so without stepping onto the stairs or blocking the landing. If the opening is angled or uses banister mounting, verify that this model permits the angle and that its hardware won’t limit the swing. After installation, open and close the gate through its range. Confirm the latch engages every time and that the gate doesn’t shift, catch, or strike surfaces. If it interferes, adjust the position.
Banister Bracket Alignment Checks
If the gate mounts to banisters, measure the opening at the exact height where the brackets will sit, not at the widest point between the posts.
On tapered or uneven posts, record the span at both upper and lower fixing points; they may differ. Check that each post offers a stable fixing surface; decorative trim alone doesn’t prove secure attachment. Photograph both banisters from the front and side at bracket height, then compare their shapes and measurements with the gate maker’s mounting diagram.
| Check | Action |
|---|---|
| Height | Measure at bracket level |
| Span | Record upper and lower points |
| Fit | Match posts to maker’s diagram |
Use only an adapter approved for your exact gate and banister shape. A scratch-protection strap or angled bracket can’t make an unsuitable or loose post secure. If the fixing surface doesn’t suit hardware, don’t mount gate there; choose another approved method.
Recheck Brackets After Week
About a week after installation, recheck every bracket and attachment point; settling or everyday use may have loosened them.
After that, inspect the gate. Tug each gate edge gently, then confirm every bracket stays secure, each strap remains tight, and the gate hasn’t shifted. Push the gate to check that it doesn’t move, and open and close it to verify the latch engages consistently.
Look along the sides for new gaps near walls or banisters; even a small opening can weaken the barrier. If you find loose hardware, tighten or replace parts only as the manufacturer directs. Don’t improvise with extra screws or altered fittings. Stop using the gate if any bracket or mounting point is damaged, and repair or replace it before use resumes.
Conclusion
Before you buy a dog gate, confirm every measurement at the top, bottom, and banisters. Move obstructions, mark each landing, and measure the clear opening where the gate will sit. Check bracket alignment and photograph suitable mounting points. Test the gate’s swing without letting your dog near the stairs. If anything shifts or feels loose, stop and adjust it before use. Recheck brackets after the first week and regularly thereafter.