How to Insulate a Dog House for Winter (Walls, Floor and Roof)
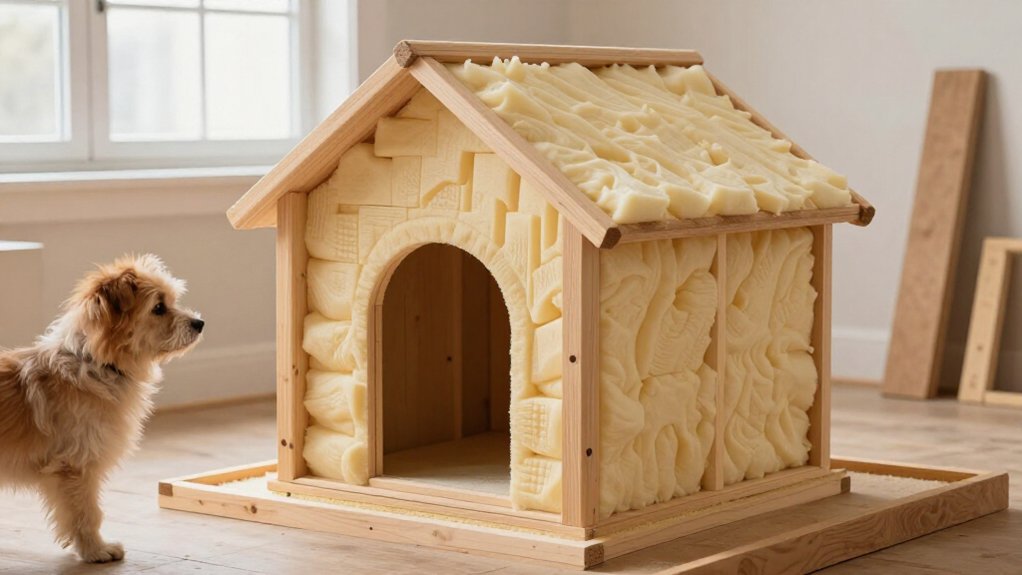
To keep your dog warmer, insulate the walls, floor, and roof with snug foam panels, then cover every exposed edge with chew-resistant plywood or plastic.
Raise the house above damp ground, seal cracks with pet-safe caulk, and add a flexible door flap without blocking ventilation. Start with clean, dry bedding, and replace damaged weatherstripping.
Check overnight temperatures and watch for condensation; if the shelter stays cold or damp, bring your dog indoors. More practical tips follow.
Winter Warmth and Dryness
To help your dog stay warm and dry, fit foam boards to the walls, roof, and floor to reduce heat loss. Raise the house on small feet and place foam board or a rubber mat beneath it to limit contact with cold, damp ground. Cover wall and roof insulation with plywood or another protective panel so your dog can’t chew it and moisture can’t easily reach it.
Seal cracks and holes with wood filler or silicone sealant to keep drafts and water out. Add waterproof roofing, such as bitumen or a tarp, to help keep rain and snow outside. Fit a flexible flap over the entrance to block drafts, but keep an air vent open so moisture can escape and condensation is less likely.
Gather Materials and Measure Panels
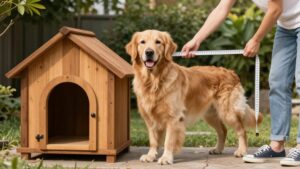
Once you’ve planned how to block drafts and moisture, measure the dog house before buying insulation. Measure the inside width and height of every wall, then measure the floor and roof. Multiply dimensions to find each surface area, add the areas, and include extra material for trimming and fitting. Accurate measurements help you buy enough without crowding the shelter.
- Choose lightweight foam or Styrofoam boards for walls and roof.
- For the floor, use foam boards or a rubber mat.
- Plan for one or two panels per side, depending on the shelter’s size.
- Gather a tape measure, straightedge, utility knife, sturdy adhesive or staple gun, and plywood or plastic covering panels.
Cut carefully with a stable surface and keep sharp tools away from your dog.
Step 1: Remove Bedding and Debris
Before inspecting or insulating the dog house, remove all bedding, toys, and loose debris so every surface is clear.
Set reusable items aside while you work, and discard bedding that’s damp or moldy. Wear gloves if you handle visible mold, and avoid shaking contaminated material indoors. Clean away mold and bacteria from the interior before adding insulation.
Brush or vacuum dirt from corners and floor cavities, where debris can hide damage or keep insulation from fitting snugly. Check the cleared walls, floor, and roof for signs of wear as you prepare each surface. Don’t rush this step; a clean interior helps you spot problems and gives insulation a better fit.
Let cleaned surfaces dry before fitting insulation to avoid trapping moisture inside the shelter.
Step 2: Seal Gaps With Caulk
With the interior clean and dry, inspect the dog house for cracks and holes that could let cold air or moisture in.
Before you add insulation, inspect seams, joints, corners, and openings. Small gaps can admit drafts and moisture, reducing comfort. Choose silicone sealant or wood filler labeled for the surface you’re repairing. Apply caulk only to clean, dry areas, pressing it into each gap to form a continuous seal.
Smooth the bead to close the opening without thin spots. Keep your dog away from the work area, and follow the product’s directions for ventilation and handling. Wait for the labeled curing time before installing insulation or letting your dog use the house. A sound seal helps protect your dog from drafts and dampness.
Step 3: Install Wall Insulation Panels
Measure each wall cavity and cut insulation panels to fit snugly, leaving a little extra for trimming. For a framed build, trace the cavity boundaries and friction-fit each panel without glue, so you can remove or adjust it if needed.
For a retrofit, secure panels with sturdy adhesive or a staple gun, following the insulation maker’s instructions and keeping fasteners away from exposed edges. Cover the insulation with plywood, beadboard, or plastic sheeting; an intact barrier helps prevent your dog from chewing or scratching fibers.
Seal small gaps around fitted panels to limit drafts, but don’t block necessary ventilation. Inspect for loose material, sharp staples, or reachable openings, and check your dog regularly in cold weather. Keep the shelter dry and adequately ventilated year-round.
Step 4: Install Floor and Roof Insulation
To insulate the floor, fit two ¾-inch panels snugly into each cavity between the framing, then cover them with plywood. Cut the plywood into manageable sections, and place each joint directly over a floor joist so the surface stays supported. Check that panels lie flat before fastening the covering; a stable floor helps your dog rest comfortably and reduces gaps that can let cold air in.
Measure and cut roof insulation to match the panels. Apply adhesive such as Titebond Thick and Quick, following its label and keeping your work area ventilated. Use brads and weights to hold the insulation while the adhesive dries. Finish with a waterproof panel or rubber sheeting to keep moisture out; let all materials set before your dog uses the house.
Step 5: Cover Exposed Foam Edges
Once the insulation is in place, cover every exposed foam edge with plywood or plastic panels to keep your dog from chewing or scratching it. Measure each area and cut the covering to fit snugly, leaving no accessible edges or gaps. Secure panels firmly with suitable fasteners or pet-safe adhesive, following product directions and avoiding sharp points that could injure your dog.
Check that the material won’t loosen when your dog moves against it. On the roof, protect insulation edges beneath a waterproof panel or rubber sheeting to limit moisture exposure. Damp insulation can lose effectiveness and may encourage deterioration. Inspect the covering regularly, especially after storms or rough use. If you find damage or an opening, repair it promptly so foam stays inaccessible.
Step 6: Install Vinyl Door Flap
Add a flexible vinyl or rubber flap to help block drafts without making the entrance difficult to use. Measure the doorway, then cut the flap slightly larger than the opening so it overlaps the edges and limits gaps. Secure its top with screws and a batten, or another sturdy attachment that can withstand repeated movement.
Check that the flap hangs freely and doesn’t drag, catch on the frame, or obstruct your dog’s entry and exit. Inspect the edges and hardware for sharp points, loose parts, or pieces your dog could chew off. Introduce the flap calmly, then let your dog try passing through it. If it snags or makes passage difficult, reposition or trim it while preserving enough overlap to reduce drafts safely.
Monitor Overnight Temperatures
Because overnight lows can expose weak spots in insulation, place a min–max thermometer at your dog’s sleeping height and check the coldest reading each morning.
Repeat checks for several cold nights; one reading can’t show how well the insulated walls, floor, and roof perform. Compare the shelter’s minimum with the outdoor temperature. If readings stay close, inspect for drafts or gaps and assess insulation.
If the house gets too cold, check for air leaks and damp bedding; confirm the floor’s raised and dry. Keep ventilation open while monitoring; don’t trap excess moisture. Use readings to guide changes, then check again. If your dog remains uncomfortable, move them indoors or offer a warmer safe shelter. Your dog’s comfort and safety matter more than a target number alone.
Prevent Condensation Build-Up
Condensation forms when warm, moist air meets cold surfaces, so insulate the walls, floor, and roof to reduce heat loss and keep interior surfaces warmer.
Seal cracks and holes with wood filler or silicone before adding insulation; this limits drafts and moisture entry. Cover foam with plywood or plastic panels to prevent chewing and contact with indoor moisture. Keep an air vent open, raise the house off the ground, and use a waterproof roof covering.
Check regularly for dampness, mold, or damaged seals. If bedding feels wet, replace it and let the shelter dry before your dog returns. Dry conditions help your dog rest safely.
| Action | Benefit |
|---|---|
| Insulate walls, floor, roof | Warm surfaces |
| Seal cracks | Limit moisture |
| Cover foam | Prevent chewing |
| Vent and elevate | Release dampness |
Replace Damaged Weatherstripping
Cold air can slip through worn weatherstripping around the entrance. Inspect the door edges and opening for strips that are cracked, loose, or flattened; these gaps can admit cold air and undermine other insulation.
To replace them, remove damaged material and clean the surface so the new strip adheres securely. Fit replacement weatherstripping snugly around the opening, but leave enough clearance for your dog to enter and exit easily. A tight seal shouldn’t become an obstacle, especially for an older or mobility-limited dog.
Cover or secure the strip so your dog can’t chew it or pull it loose. Check the seal periodically; moisture and everyday wear can reduce its effectiveness. If you find gaps again, repair them promptly to help keep the shelter warmer.
Conclusion
With insulated walls, floor, and roof, sealed gaps, and a flexible door flap, you can help your dog stay warmer and drier through winter. Check overnight temperatures and watch for condensation, since damp insulation can reduce warmth and encourage mold. Replace damaged weatherstripping, keep bedding clean and dry, and make sure your dog can enter and exit freely. Insulation helps, but it isn’t a substitute for bringing your dog indoors during dangerous cold or severe weather.