How to Measure for a Dog Gate: Doorways, Hallways and Wide Openings
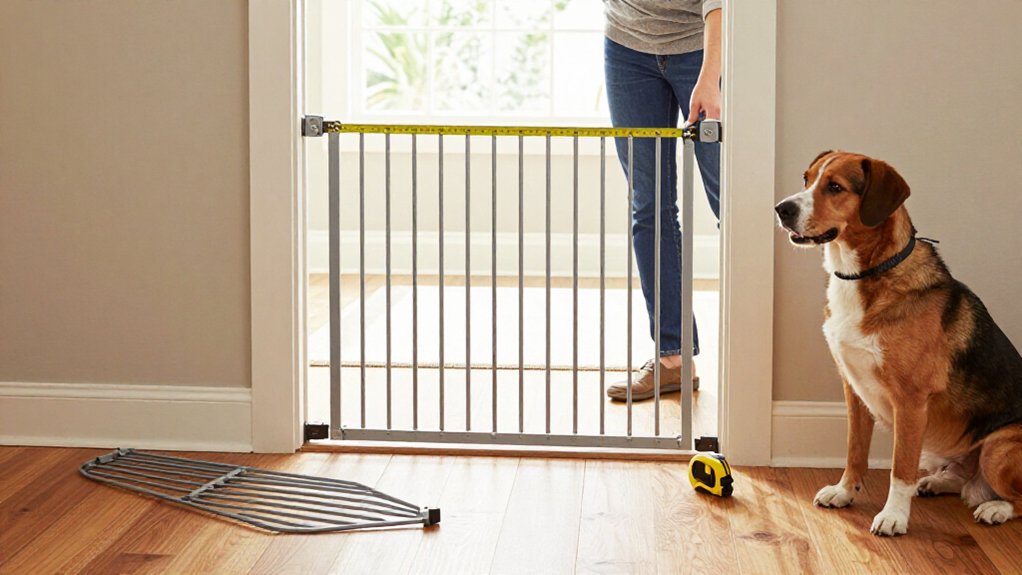
To measure for a dog gate, clear obstacles and move furniture beyond jumping reach. Inspect the mounting surfaces to verify they’re flat, sturdy, and clear. Use a steel tape measure, keeping it level and taut between mounting points.
Record widths at the top, middle, and bottom, accounting for trim or baseboards. Compare the largest and smallest measurements with the gate’s adjustment range. If it won’t fit or latch, don’t force it. Continue for fitting checks.
Measure Opening Widths
Measure the opening at the top, middle, and bottom, then use the largest width to choose a dog gate.
Check that this measurement falls within the gate’s stated adjustment range, counting any extension panels you’ll use. A standard walk-through gate typically fits openings about 29.5–39 inches wide; extra-wide models commonly cover about 47–58 inches. Traditional metal gates with extensions often fit roughly 56–81 inches, while configurable panels can span much wider spaces.
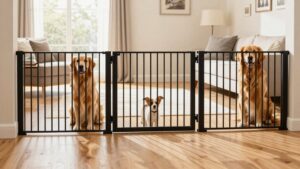
If your opening exceeds a single gate’s range, consider a multi-panel divider or a gate made for wide openings. Before buying, confirm that the complete setup covers the full measured width and installs securely. A gap at either side can let your dog slip through or weaken the barrier before installation.
Gather a Steel Tape Measure
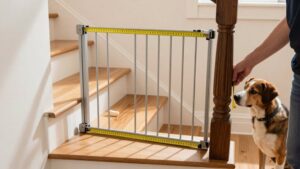
Before comparing your opening with a gate’s width range, grab a steel tape measure and check the distance between the actual mounting surfaces, such as the doorframe or hallway walls. Keep the tape straight and taut across the opening; a sagging or angled tape can give you a misleading reading. Check three points:
- Measure the width at the top, between the mounting surfaces.
- Repeat at the middle, keeping the tape level.
- Measure at the bottom and record all three readings.
- Use the largest measurement when comparing the opening with the gate’s stated width range.
For a wide opening, measure the entire span from one intended mounting surface to the other. Don’t estimate it from a nearby doorway; even similar-looking openings can differ.
Write measurements in one unit, such as inches, so you can compare them accurately with the manufacturer’s specifications. A secure fit helps limit gaps your dog could push through easily.
Step 1: Move Obstacles From Doorway
Clear shoes, toys, furniture, and other items from the doorway so they don’t obstruct your tape or the gate. Move them far enough away that you can stretch the tape across the full opening and position the gate. Clear the floor and the wall or doorframe where the gate’s brackets or pressure pads will sit; items in those spots can interfere with placement.
Check surrounding furniture. A chair, sofa, or low table near the barrier could give your dog a step to climb over, so move it beyond jumping reach. Once the doorway’s clear, measure the opening at the top, middle, and bottom. Keep the tape level and take each reading across the points. Use the largest measurement when choosing your gate size.
Step 2: Inspect the Mounting Surface
Inspect each planned mounting point to confirm it’s flat, sturdy, and clear for the gate’s brackets or pressure pads. Check that each bracket has enough contact area; Retract-A-Gate needs at least 1.5 inches of mounting height and 0.75 inches of width. For that model, place upper brackets 30½ inches above the floor and lower brackets 3–4 inches above it.
If a banister lacks a flat face, use a customer-provided adapter board at least 1.5 inches wide, 1 inch thick, and 32 inches tall; you may need a taller board. Confirm the surface can hold the screws or hardware, especially beside stairs or if your dog may push against the barrier. Inspect for a stable fit before installation. Wall brackets can support angled or diagonal placement.
Step 3: Measure Between Mounting Points
Measure the clear distance between the exact surfaces where the gate’s brackets or pressure cups will sit, not just across the visible doorway opening.
For an uneven opening, measure between the mounting points at the top, middle, and bottom. You’ll use the largest measurement to confirm that the gate’s stated fit range includes the opening; otherwise, the gate may not install securely.
With Retract-A-Gate, check that each bracket has a flat mounting surface at least 1½ inches high and ¾ inch wide. Position its upper brackets 30½ inches above the floor and its lower brackets 3–4 inches above the floor.
If a banister lacks a suitable mounting area, install a customer-provided adapter board at least 1½ inches wide, 1 inch thick, and 32 inches tall.
Step 4: Record the Narrowest Measurement
Because doorframes and hallways may be out of square, record the opening’s width at the top, middle, and bottom. Use the same measuring points you’ll use to install the gate, and write down each reading so you can compare them accurately.
Treat the smallest reading as the opening’s usable width. Don’t rely on the widest point to decide whether a gate will fit; a tighter section could prevent secure installation. Check that the narrowest measurement falls within the gate’s stated adjustment range. For a retractable or expandable model, compare it with the manufacturer’s specified minimum and maximum span. If the narrowest width falls outside that range, choose a different gate rather than forcing the fit. A gate that doesn’t match the opening may not stay securely in place, putting your dog at risk.
Step 5: Account for Baseboards
After recording the narrowest width, check the opening at the gate’s planned mounting height. Baseboards can project from the wall, making the surface uneven or reducing width. Measure where the gate and its brackets will sit, rather than only at floor level. Check that each bracket can rest flat against a wall or doorframe.
Retract-A-Gate brackets need a flat mounting area at least 1.5 inches high and 0.75 inches wide. If a baseboard blocks a flush fit, account for its depth when checking the opening’s width and mounting clearance. Don’t force a bracket against an uneven surface; poor contact can weaken the installation. For a banister, a customer-provided adapter board can provide a flat mounting surface. The board must be at least 1.5 inches wide, 1 inch thick, and 32 inches tall.
Step 6: Apply Painter’s Tape to Mark Points
To keep your measurements consistent, mark the opening with painter’s tape at the top, middle, and bottom.
For a doorway or hallway, place tape at the narrowest usable edges where the gate’s brackets or pressure cups will rest. For a wide or uneven opening, mark both sides at each height, then measure between matching marks. Keep tape on flat mounting surfaces, not trim or angled edges that can’t support the gate securely. Make sure each marked area has room for the hardware; for example, Retract-A-Gate brackets need at least 1.5 inches of surface height and 0.75 inches of width.
Write down each width separately. Use the largest measurement when comparing the opening with the gate fit range, so you choose a model that fits safely.
Verify Tape-Measure Accuracy
Once you’ve marked the opening, check your tape measure for damage, bends, or a loose hook that could skew the reading.
Keep the tape straight and level across the opening; sagging or measuring at an angle can distort the width. Pull it snug without stretching it, and read the markings at eye level to avoid misreading them.
Measure at the top, middle, and bottom, then use the largest reading when checking gate fit. Repeat each measurement once.
If the readings differ, recheck the tape’s alignment and hook position. Keep your hands clear of pinch points, and don’t let the tape snap back; retract it slowly to prevent cuts or startling your dog. Before recording numbers, make sure the tape hasn’t shifted from marked points.
Gate Doesn’t Fit Properly
If the gate doesn’t fit, compare the opening’s largest measurement, taken at the top, middle, and bottom, with the gate’s stated width range.
If the opening exceeds that range, choose a correctly sized model or compatible extension panels; some systems span eight feet or more. Never force a gate into an opening beyond its limits.
| Check | Requirement |
|---|---|
| Bracket surface | Flat; at least 1.5 in high by 0.75 in wide |
| Retract-A-Gate brackets | Top: 30½ in above floor; lower: 3–4 in |
| Banister adapter board | At least 1.5 in wide, 1 in thick, 32 in tall |
For Retract-A-Gate, verify the mounting surface is level and wide enough; follow its installation instructions. These checks help you choose a stable fit rather than improvising with an unsuitable opening. Measure all three points before deciding, because uneven openings can make a gate incompatible even when one spot seems suitable. Verify each bracket has adequate flat support before installation.
If the opening exceeds your model’s maximum width, don’t install it there.
Check Gate Latch Alignment
With the gate set to the measured opening width, check that the latch lines up with its catch.
If the parts don’t meet cleanly, don’t rely on the gate to contain your dog. Recheck the opening and installation, then adjust the gate. For a pressure-mounted model, tighten mounting points evenly. Uneven pressure can pull the frame out of square and prevent reliable latching. Check that the gate stays stable as you secure it.
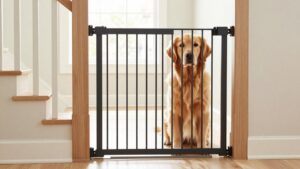
Open and close the gate several times, checking that the latch engages. If you’re using an automatic-close model, walk through and let it shut on its own; it should close fully and latch without help. For a retractable gate, extend the mesh across the opening and confirm the lock engages securely. Don’t leave the gate in use until the latch or lock holds consistently.
Conclusion
Before you install a dog gate, confirm every measurement at the points where you plan to mount it. Check that the gate sits securely, clears nearby obstacles, and keeps its latch aligned so it closes without force. If the opening exceeds the gate’s range, you’ll need an approved extension rather than improvising.
After installation, test the latch and apply firm pressure to the gate. Recheck the fit regularly, especially after moving or adjusting it.