How to Clean a Dog Crate: Wire, Plastic and Soft-Sided Methods
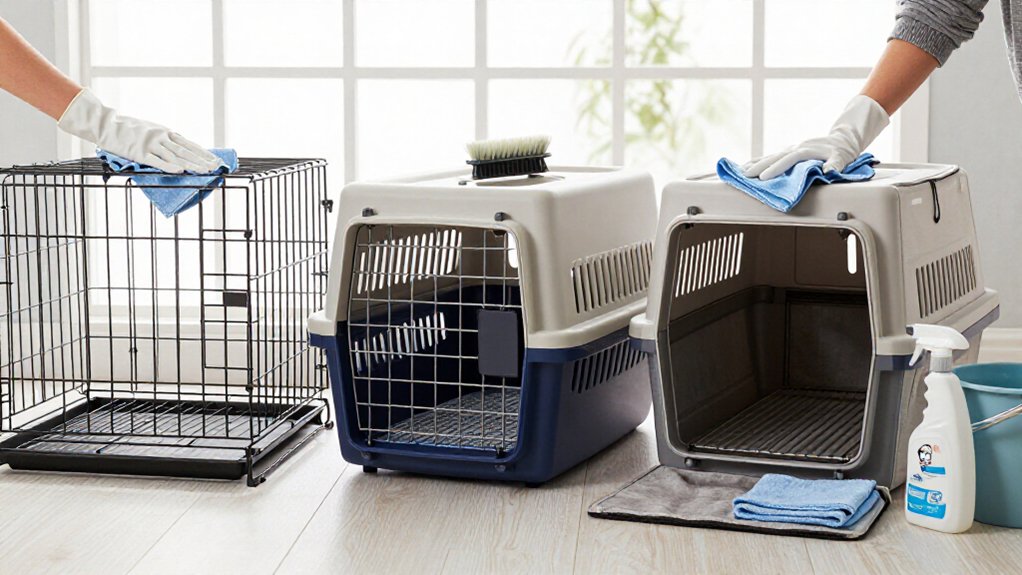
Clean your dog’s crate every 2–4 weeks and after accidents to limit odors and germs. Remove bedding, toys, and bowls, then sweep or vacuum debris.
Use warm water and mild, pet-safe detergent; scrub wire bars and trays, and follow the manufacturer’s directions for plastic or soft-sided crates.
Rinse or wipe as directed, then dry every surface and item completely before reassembly. Check latches, hinges, and bars for damage or rust. More tips keep crates fresher.
Odor and Germ Reduction
To reduce odors and germs, remove your dog’s bedding, toys, and bowls, then vacuum or sweep out fur, crumbs, and debris.
After accidents, remove waste promptly and clean the affected area so residue doesn’t linger. Urine and other organic matter can hold odors even after the surface looks dry, so give the spot careful attention. Wash crate surfaces regularly, and follow product directions when disinfecting; rinse thoroughly to remove residue. Clean the crate every two to four weeks, as well as after accidents, to keep buildup under control.
Wash bedding regularly with fragrance-free detergent, and return it only when it’s completely dry. Damp fabric can develop mildew and make the crate smell stale. Let the crate air-dry fully before your dog climbs back in. A clean, dry space helps your dog feel comfortable and keeps unpleasant smells from taking over between cleanings and busy days.
Pet-Safe Cleaning Solutions
Choose a cleaner labeled pet-safe or non-toxic, and follow its dilution and use instructions. Your dog’s comfort matters, so keep them away while you clean and ventilate the area.
- For routine cleaning, dilute mild soap or dish detergent in water and wash crate surfaces. Rinse thoroughly so residue won’t irritate your dog’s skin.
- After accidents, apply a pet-safe disinfectant or enzyme cleaner, then rinse or wipe surfaces as directed.
- Avoid ammonia, heavily scented products, and mixing cleaners. Never combine bleach with any other cleaning product.
Even products marketed as gentle can leave residue if you skip rinsing, so check the label and use only the stated amount. Wait until surfaces are dry before inviting your dog back. Proper drying protects paws and limits odors.
Step 1: Gather Crate-Safe Supplies
Once you’ve selected a pet-safe cleaner, gather warm water, mild detergent, a soft cloth or sponge, and a brush for stubborn dirt. Choose products labeled pet-safe or non-toxic, and keep a garden hose or bucket nearby to rinse wire and plastic crates. Set up in a well-ventilated area, so fumes won’t build up while you work.
Keep paper towels and a plastic bag handy to blot spills and dispose of solid waste. After washing, you may need a pet-safe disinfectant, especially if your dog’s had an accident or been ill. Follow the product label for safe use and contact time.
For a soft-sided crate, check the manufacturer’s care instructions before machine-washing. If that isn’t suitable, prepare a carpet shampooer or hand-washing supplies to clean the fabric gently. Your dog’s comfort starts with choosing the right tools.
Step 2: Remove Bedding and Toys
Clear the crate before cleaning by removing all bedding, blankets, towels, toys, and food and water bowls. For a wire crate, lift out the soft pad or pet bed and clear every item from the bottom tray. This keeps belongings dry during cleaning and helps you avoid extra, unnecessary cleanup later.
Check care labels before washing bedding and blankets; machine-wash them only when the label says it’s safe. Wash soft toys regularly, and clean non-soft toys with a pet-safe cleaner, rinsing them thoroughly afterward. Set everything aside to dry completely. Don’t return bedding or toys while they’re damp, since moisture can create an uncomfortable resting place for your dog. If an item is damaged or heavily soiled, decide whether it’s still suitable to use.
Step 3: Scrub Wire Crate Bars
Before scrubbing the wire bars, remove the tray and any loose bedding, then vacuum or brush fur and debris from the bars and joints. Scrub the entire crate with warm water and pet-safe soap, working between bars and around welds where dirt collects.
Rinse soap off thoroughly, then apply a pet-friendly disinfectant according to its label directions. Rinse the bars well afterward to remove residue. If possible, take the crate outdoors and use a hose; indoors, wash it in a bathtub lined with an old towel if it fits.
Dry every bar and joint completely with a clean towel, then let the crate air-dry fully before your dog returns. This helps prevent rust and keeps your dog’s paws and coat away from lingering moisture.
Step 4: Disinfect the Crate Tray
Remove the crate tray and clean it separately so you can reach every surface. Wash it with warm water and a mild, pet-safe detergent, using a sponge or soft brush to lift dirt and residue. Pay attention to corners where grime can collect. After washing, apply a pet-friendly disinfectant according to its label. This step matters especially after an accident or illness, when germs may linger.
Rinse the tray thoroughly to remove all detergent and disinfectant residue; leftover cleaner could irritate your dog’s paws. Wipe away excess water with a clean towel, then let the tray dry completely before returning it to the crate. Don’t rush this part: a dry tray helps keep the resting area comfortable and reduces lingering dampness for your dog.
Step 5: Rinse Fabric Seams Thoroughly
Rinse fabric seams carefully, since urine, dirt, and detergent residue can collect in the folds. Use clean water to flush each seam, paying attention to corners and stitched edges where grime can linger. Outdoors, guide a low-pressure hose over the fabric; indoors, work with a clean, damp cloth. Avoid forceful spraying or soaking, which can strain or damage the material.
Keep rinsing until the water runs clear and you can’t see or feel any soap. Leftover detergent may irritate your dog’s skin, so take time to check tucked folds. Blot excess water with a clean towel instead of rubbing, which can wear the fabric. Then let the crate air-dry completely, including inside seams. Wait until it’s fully dry before your dog uses it again.
Step 6: Refasten Removable Tray Latches
Once the tray and crate are clean, let the tray dry completely before refastening its latches. Work around the tray and secure each latch firmly in its designated position. A snug fit helps keep the tray from sliding or shifting when your dog moves.
Don’t force a latch that won’t engage; check that the tray is aligned and sits flat in the crate. Press or fasten each latch according to its design until it holds securely.
Before your dog returns, verify that every latch engages properly and the tray remains level. Take a moment to inspect the latches for cracks, looseness, or other damage.
Replace faulty parts rather than relying on a weak connection; a secure tray gives your dog a steadier, safer space.
Inspect Crate Door Hinges
As you finish cleaning, inspect the crate door hinges for looseness, bending, rust, or other visible wear.
Check that each hinge moves freely and keeps the door aligned without wobbling or catching. The door should swing smoothly and latch securely. Look closely at hinge pins, brackets, and attachment points for cracks or damage, especially on plastic crates, where stress can weaken the surrounding material.
On wire crates, dry the hinges thoroughly after washing.
Tighten loose fasteners only when the design allows safe adjustment. Don’t force a bent hinge back into shape; you could make the door less secure. When damage prevents the door from closing firmly, stop using the crate until you repair or replace it. A secure door protects your dog and reassures you.
Preventing Rust on Metal Bars
To prevent rust, rinse the metal bars thoroughly to remove soap and disinfectant residue, then wipe away excess water. Dry the bars completely after cleaning; air-dry the crate outdoors or use a clean towel or paper towels. Give joints and welds extra attention, since water and debris can collect there.
| Checkpoint | What you should do | Why it helps |
|---|---|---|
| Bars | Dry them fully | Limits moisture |
| Joints and welds | Inspect and wipe carefully | Catches trapped water |
Keep the crate dry between cleanings. Regularly inspect the bars and welds for rust. If you spot early rust, remove it with a wire brush, then consider applying non-toxic primer and spray paint to protect the metal. A little upkeep can help your dog’s crate stay safe and comfortable for longer.
Store Crate Fully Dry
Let the crate air-dry for several hours, then check that it’s completely dry inside and out before storing it. For a wire crate, pay close attention to joints and welds, where trapped moisture can encourage rust. Dry every bar and corner with a clean towel if needed.
Before you reassemble or store the crate, make sure removable trays, plastic sections, and seams are dry too. If you’ve cleaned a soft-sided crate, open it fully and let it air-dry in a well-ventilated area; don’t put it in a clothes dryer. Keep bedding and other crate items separate until they’re completely dry. Putting damp parts away can leave stale odors and create an uncomfortable space for your dog. Take a moment to check hidden folds again.
Conclusion
Keeping your dog’s crate clean helps limit odors and germs while making the space more comfortable. Choose pet-safe solutions, gather crate-safe supplies, and remove bedding and toys before you scrub. Clean wire bars and trays, then refasten latches and check door hinges.
Prevent rust by drying metal thoroughly. For plastic or soft-sided crates, follow the same careful approach and their material’s care directions. Let every part dry fully before you reassemble and store the crate.