How Often Should You Clean a Dog Crate? A Daily, Weekly and Monthly Routine
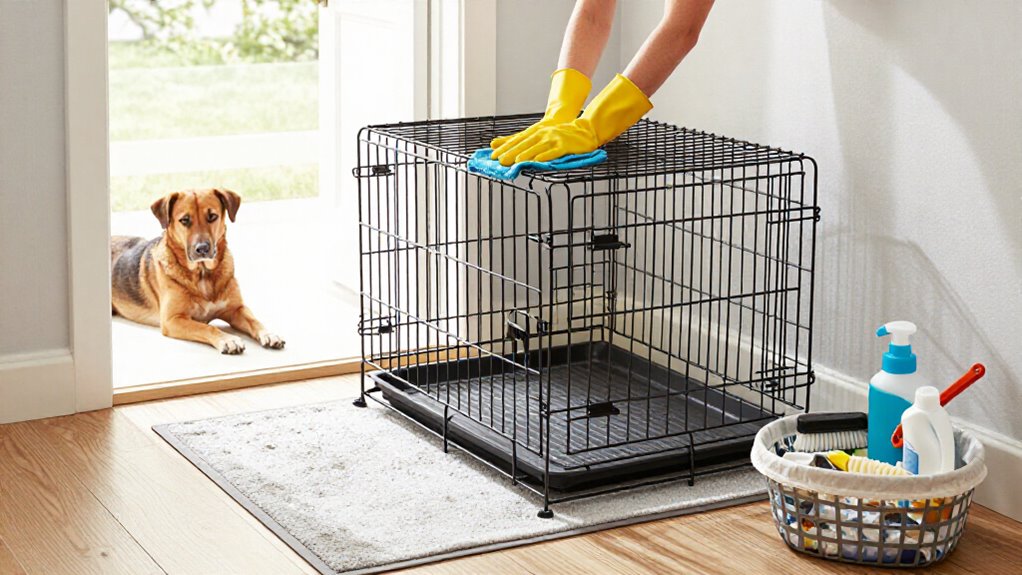
Remove droppings, urine, and damp bedding from your dog’s crate every day, and spot-clean messes with a pet-safe cleaner.
Once a week, empty the crate, wash it with soap and water, rinse, then disinfect according to product directions and let every surface dry before replacing bedding.
Each month, inspect seams, latches, and bars for rust, cracks, or wear; replace damaged parts.
Adjust cleaning after illness or travel, and use the routine below to help keep your crate clean and safe.
Crate Cleaning for Puppies
For puppies, clean the crate daily by removing droppings and soiled bedding promptly, then spot-wipe urine or mess with a pet-safe cleaner. When bedding or washable pads become soiled, wash or replace them that day; clean fabric and mats limit lingering odors and help reduce germs.
At least once a week, empty the crate, then sweep or vacuum hair and debris from bars and seams. Wash surfaces with mild soap and water, rinse away residue, and let them dry fully before your puppy returns.
Once a month, inspect wire crates for rust or cracks and check plastic seams for grime. Replace worn parts or bedding if odors remain after cleaning. A steady routine helps you notice unusual or persistent changes in your puppy’s messes.
Gather Pet-Safe Disinfectant
Before disinfecting your dog’s crate, choose a product labeled for kennel or crate use and effective against relevant pathogens, such as parvovirus. Check that it’s suitable for your dog’s environment, and follow dilution directions exactly; the right concentration helps limit exposure to lungs and paws. Prefer non-toxic, biodegradable options when available; enzyme-based cleaners can break down waste and odor-causing residues, but they don’t replace a disinfectant when pathogen control is needed.
- Clean and scrub the crate first.
- Apply disinfectant to surfaces.
- Keep surfaces wet for about 10 minutes, or longer if the label directs.
- Rinse as directed and let the crate dry fully before your dog returns.
Avoid bleach or ammonia unless specifically formulated for pet-safe use; rinse thoroughly, since residue can harm your dog.
Track Crate Cleaning Dates
A simple cleaning log helps you keep your dog’s crate sanitary and spot missed tasks. Mark the date of your last deep clean on a calendar, then use it to set your next weekly sanitation date. Record quick daily checks, including spills wiped and uneaten food removed.
Choose the same day each week for scheduled cleaning and note when you complete it; consistency helps you monitor odor and bacteria control.
| Routine | Date to record |
|---|---|
| Daily spot check | __________ |
| Weekly sanitation | __________ |
Once a month, log your deep clean and inspect hardware for rust, cracks, or worn latches. If the crate looks dirty or damp, or an odor lingers, update your notes and clean sooner. Keep the calendar somewhere you’ll see it each day. A brief record can help you adjust care without relying on memory.
Remove Bedding, Scrub, Disinfect
Remove your dog’s bedding, accessories, and loose debris so you can clean every crate surface. Scrub the floor and crevices with warm, soapy water, rinse away residue, then apply a pet-safe disinfectant for the label’s recommended contact time.
Rinse thoroughly and let the crate dry completely before reassembly.
Remove Bedding and Debris
Take your dog out, then remove the bedding, crate mat, and toys so you can reach dirt and germs in seams and corners. Shake out washable bedding to release loose fur and crumbs; discard items that are heavily soiled or can’t be cleaned safely. Check mats and toys for dampness, waste, or damage, and launder them according to care labels.
Remove debris from the empty crate with a brush or cloth, paying attention to corners and latches. If your dog sheds heavily, brushing away excess fur between deep cleans can limit buildup. Wipe spills promptly; dried residue can be harder to remove and may interfere with later cleaning. Let bedding dry completely before returning it, since trapped moisture can contribute to odors and mildew.
Scrub Crate Surfaces
After removing your dog, bedding, and accessories, rinse or wipe the crate to clear away fur and visible dirt before disinfecting. Organic matter can reduce a disinfectant’s effectiveness, so don’t skip this preparation. Shake out or wash the bedding separately while you clean the crate.
Scrub the crate’s surfaces with a pet-safe cleaner, paying close attention to seams, corners, and door areas. These places can trap urine residue and odor-causing buildup. Follow the cleaner’s directions, then apply a pet-safe disinfectant.
Keep the surfaces visibly wet for the product’s full contact time—commonly at least 10 minutes—so it can work as intended. Once disinfecting is complete, rinse away residue and dry the crate fully, including edges and hardware, before replacing bedding or accessories. Thorough drying helps limit lingering moisture and odors.
Rinse Away Residue
Start by clearing the crate of bedding, mats, and toys; shake out items that may hold hair or moisture, then set them aside. Rinse or wipe away loose dirt before scrubbing, including debris along seams and bars.
This step removes residue that can interfere with disinfectant effectiveness, so you aren’t cleaning over soil.
Use warm water and mild soap to scrub surfaces. Pay attention to corners, seams, and grime around latches and hinges, where buildup can persist.
Rinse thoroughly to carry away loosened soil and soap, then check crevices for residue. Don’t return bedding or toys until the crate and each item are fully dry; trapped moisture can encourage odors and leave your dog resting on damp surfaces.
Apply Pet-Safe Disinfectant
For effective disinfection, remove bedding, toys, and food and water items, then brush away loose debris and grime from seams, corners, and latches. Disinfectants work best on clean surfaces: scrub remaining soil with a crate-safe brush, since organic material can shield microbes and reduce product effectiveness.
Choose a disinfectant labeled safe for your dog’s crate material and follow its directions for dilution and use. Apply it across every surface, including bars, tray, seams, and latch areas, keeping the surface visibly wet for the full contact time on the label. Many kennel routines use about 10 minutes, but the product instructions take priority. Don’t shorten that interval; the stated contact time supports the product’s tested performance.
If the label requires rinsing, rinse thoroughly to limit residue that could irritate your dog’s paws or nose. Use gloves or ventilation if directed, as its label directs, and keep pets away.
Dry Before Reassembly
Once you’ve removed the bedding and accessories, scrub the crate with warm water and mild soap before applying a pet-safe disinfectant for the label’s contact time, often about 10 minutes. Removing every mat and accessory first lets cleaner reach seams and crevices. After the label’s contact time, rinse bars, plastic seams, and latch areas thoroughly to remove residue.
Dry the crate with a clean towel or let it air-dry. Check corners and hinges for damp spots before reassembly; lingering moisture can cause odors, mildew, or bacterial growth. Return bedding only when every surface is completely dry. This extra time helps keep your dog’s resting space clean and comfortable, and limits contact with residue or damp materials before your dog returns to the crate again safely.
Adjusting for Travel Crates
After each trip segment, wipe down your travel crate, replace damp pads, and check for moisture before the next leg. Let all surfaces dry completely to limit lingering dampness and odor.
Each month, inspect latches, seams, and padding for wear that could affect your dog’s safety and comfort.
Clean After Each Trip
Clean your dog’s travel crate after every trip to remove debris and limit odor and germ buildup. Remove loose hair, crumbs, and soiled items, then wipe the crate’s surfaces with a damp cloth to lift visible debris. If you find urine or vomit, spot-clean it promptly with a pet-safe cleaner and blot dry the area to keep waste from soaking into seams or ridges.
Wash trip-used mats and bedding as soon as possible with fragrance-free detergent; dirty textiles can retain odors after surface cleaning. Before your next outing, you can spray and wipe the crate with a pet-safe disinfectant, if its label and the crate material allow it. Use this step to reduce germ carryover between trips, especially after illness or soiling, when practical.
Allow for Thorough Drying
Dry the crate completely after washing or disinfecting, paying close attention to seams, latches, and corners where moisture can linger and promote odors or mildew. Wipe away excess water, then leave the door open and let the crate air-dry until no dampness remains.
Plastic and wire models may need extra time because tight spaces hold moisture. For a travel crate, use the standard; plan to dry it at your next stop or at home before replacing bedding. If you can’t wait for natural drying, use a fan or low heat, and keep the crate uncovered.
Don’t reassemble it or return your dog’s pad and bedding until every surface is dry. Damp fabric can reintroduce smells and bacteria, so allow this final step to protect cleanliness.
Check for Travel Wear
During travel, inspect your dog’s crate daily for scuffs, scraped seams, and dried residue in corners or around door latches, where grime can collect. After each ride, look for damp bedding or mats, especially in humid weather, and wipe them dry promptly to limit mildew odor.
On wire crates, check bar ends and hinges for rust; corroded spots can spread quickly if you don’t address them during routine cleaning. For plastic or composite models, inspect seams and handles for trapped hair or food, and skip abrasive scrubbers that can scratch surfaces and create places for dirt to collect.
If odor persists, stains return, latches loosen, or panels crack after cleaning, treat these as wear flags; repair or replace the crate to keep travel secure.
Bedding Stays Dry Overnight
Check your dog’s crate bedding before bed, especially in humid weather or if your dog drinks heavily. Use a dry, washable mat, and remove damp bedding promptly after any soiling. If you spot-clean a spill, wipe the area and let it air-dry fully before replacing bedding.
Trapped moisture can encourage odors and mildew, so don’t cover a damp surface.
Check seams and corners, where moisture may linger. During weekly cleaning, use pet-safe disinfectant sparingly and dry every surface completely before your dog returns overnight.
In the morning, feel the bedding again. If it feels slightly damp, replace or flip it and investigate the source, such as a spill or splashed water. Your dog deserves a resting place, and keeping it dry helps limit smells.
Damaged Crate Latches
A secure latch helps keep your dog safely contained, so inspect it each time you clean the crate. Check whether it sticks, fails to engage fully, or feels loose; address any of these problems without delay before your dog uses the crate again.
Each week, clean and dry around the mechanism with a pet-safe cleaner, then rinse well. Grime, dried saliva, and bedding fibers can stop the latch from locking securely. During your monthly deep check, look for rust, cracks, or bent parts.
Replace a damaged latch or crate, since faulty hardware can fail and compromise safety. After cleaning, test the latch several times. It should hold firmly without wobbling. If it doesn’t, arrange a repair or replacement rather than simply cleaning it again.
Preventing Rust on Metal Crates
Wipe metal crate bars and seams daily to remove water, urine, and food residue, since lingering moisture can encourage rust. After weekly cleaning, dry the crate fully, especially corners and joints where bars meet; water trapped under clips or sliding panels can trigger corrosion.
- Choose mild, pet-safe cleaners, rinse thoroughly, and avoid residue that can weaken protective coatings.
- Brush off rust spots promptly, dry the area, and inspect nearby bars for spread.
- Check hinges, screws, and latches periodically for wear or corrosion.
- Replace heavily rusted hardware to limit continued moisture contact and rust creep.
These checks mean you’ll preserve the crate’s finish and keep cleaning effective. If a coating looks damaged, monitor that spot closely and address corrosion before it reaches neighboring metal bars.
Adjust Schedule After Illness
After your dog has been ill—especially with vomiting, diarrhea, or a possible contagious infection—clean and disinfect the crate more often than usual. Remove soiled bedding or mats immediately and wash them separately on a hot, fragrance-free cycle. Organic residue can make disinfectants less effective, so clean surfaces before applying a product.
Choose a pet-safe disinfectant tested against difficult pathogens, such as parvovirus, and follow its label carefully. Keep surfaces wet for the required contact time, often at least 10 minutes, before rinsing. Sanitize high-touch areas daily until your dog has fully recovered. If symptoms were serious, continue daily wipe-downs and full disinfection for several days after improvement.
Disinfect the crate fully before a healthy dog uses it. Once recovery is clear, return to your regular weekly and monthly routine.
Conclusion
Keep your dog’s crate clean with a routine that fits their age, health, and habits. Remove bedding, scrub surfaces, and use a pet-safe disinfectant as needed; let everything dry fully before your dog returns.
Check latches and metal for damage or rust, and clean travel crates after use. If illness occurs, disinfect promptly and adjust your schedule. Track cleaning dates so you can spot patterns, protect your dog’s comfort, and maintain a safer resting space.