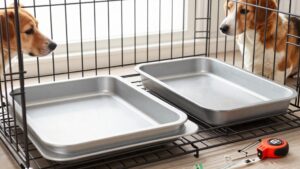
How to Measure a Dog Crate for a Replacement Tray That Actually Fits
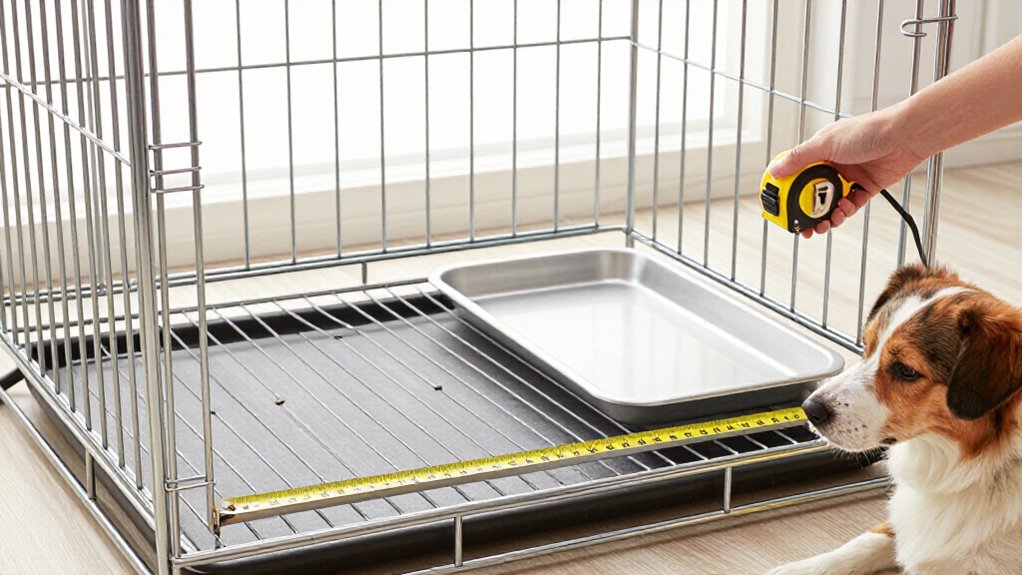
To measure for a replacement tray, remove the old tray, bedding, and pads, then expose the crate’s bottom frame. Measure the usable floor from front to back and side to side, keeping your tape straight and accounting for inward-projecting feet.
Don’t use the wider top opening. Check for bent wires, and inspect the old tray’s edges, corners, and lip for damage or warping. Choose a tray about ¼ inch smaller in both dimensions; more fit tips follow.
Interior Floor Measurements
Before choosing a replacement, remove the old tray and measure the crate’s interior floor, not its exterior frame or listed size. For length, measure from front to back, keeping your tape flat against the bottom wire frame.
Measure width from inside left to inside right, again with the tape flat on that same base. These measurements, not the crate’s upper opening, show the space your replacement tray must cover. If the tray is missing, measure the base where it sits; the crate can be wider higher up, so don’t use the upper dimensions as a substitute. Choose a tray about ¼ inch smaller than your measured interior floor in both length and width. That small clearance helps the tray slide in smoothly without binding.
Remove the Existing Tray
Remove the existing tray to expose the crate’s bottom wire frame. Pull it out before measuring; the frame gives you the correct reference plane, while measuring higher can distort the fit.
With the tray removed, note these dimensions:
- Crate floor length, front to back.
- Crate floor width, inside left to inside right.
- Old tray’s flat floor length and width.
- Old tray’s lip height, measured separately.
Keep your tape resting flat against the bottom wire frame for exact crate dimensions. Tray listings may include the lip in overall measurements, so don’t compare that figure directly with the crate’s usable floor size. Record each value with its label and units before you order. That makes replacement sizing clearer and helps you spot misleading product dimensions.
Step 1: Clear the Crate Floor
With the tray out, clear bedding, pads, and other items from the crate floor so you can measure where the tray sits: on the bottom wire frame, not higher up where the crate may be wider. That distinction matters because crate walls can angle outward above the base, making the upper opening a poor guide for a replacement tray. Keep the floor fully exposed, including corners and narrow edges where the tray rests.
If the original tray’s available, set it aside to check its length, width, and lip height as reference points. If it’s missing, the exposed floor will be your reference. Remove anything that could shift or hide an edge before you begin measuring. Keep nearby any product notes or packaging for comparison.
Step 2: Measure Interior Floor Length
Measure the crate’s interior floor length with the tray removed, running a tape from the inside front edge to the inside back edge along the bottom wire frame. Measure at the base where the tray rests, not higher on the crate; the frame can flare outward above the floor and give you a misleading reading. Keep the tape flat and straight against the bottom wires, and record the distance where the tray’s ends sit.
If you still have the old tray, check its flat floor length as a useful reference. Don’t use its overall outside length alone: the raised lip can affect how a listing describes the tray, so compare the lip height as well. For easier installation, look for a replacement about ¼ inch shorter than your measured interior floor length. That small clearance helps the tray slide into place without forcing it against the frame or catching on a wire.
Step 3: Measure Interior Floor Width
For an accurate width, take out the tray and measure between the inside faces of the left and right frame at the crate’s floor. Keep the tape measure flat against the bottom wire frame, not across the crate’s top; many crates flare outward, so an upper measurement can overstate the tray width. Read the measurement at the narrow floor level, where the tray rests.
If the tray is missing, measure the inside base that supports it, from frame to frame, rather than measuring the crate’s exterior. Record the width in inches or centimeters and note the unit. Then check your crate’s brand and model before choosing a replacement: crates sold under a nominal size can have different widths, and tray dimensions aren’t universal.
Step 4: Order a Slightly Smaller Tray
Once you’ve measured the inside base where the tray rests, choose a replacement about ¼ inch shorter in both length and width so it slides in smoothly.
Measure the tray pocket—not the crate’s exterior or the wider frame near the top—because those dimensions can make a correctly sized-looking tray too large. Subtract roughly ¼ inch from your measured interior length and width, then use those target dimensions when you shop. This modest clearance helps the tray move into place without forcing it, while keeping it close to the crate’s floor size.
Don’t assume the model name gives you the tray dimensions: a MidWest 42-inch iCrate, for example, uses a 41 × 27.38-inch interior tray reference size, not a 42-inch tray. Treat listed sizes as a starting point, since brands and models vary. Before ordering, compare the product’s actual dimensions carefully with your measurements and confirm both length and width.
Step 5: Check for Protruding Crate Feet
Check for feet or corner fittings that protrude inward at the crate’s floor, since they can narrow the space available for the tray. Measure the interior base at the crate’s bottom, not higher up where the frame may be wider. Note whether each foot reduces usable length, width, or both, then record the clear measurements between the inward projections.
Compare those figures with the replacement tray’s actual dimensions; the crate’s listed size is only a starting point and may not reflect its floor clearance. For easier insertion, choose a tray about ¼ inch smaller than the usable interior measurements. If the feet make sizing uncertain, send the retailer the crate’s brand and model along with your measured interior length and width for confirmation before you order.
Step 6: Inspect Tray Edges and Corners
With the floor clearance measured, inspect the old tray’s corners and edges for cracks, warping, or wear that could affect its fit. Check the corners for splits, crushed sections, or bowing, then set the tray on a level surface and note whether it rocks or sits flat.
Inspect each edge and raised lip for bends, gaps, or uneven height; lip profiles differ, with examples from 1 to 1.57 inches, so record the actual tray if intact. Look closely where its perimeter contacts the crate’s bottom frame. Worn or damaged edges can prevent a stable fit, allowing the tray to slide or catch during ordinary use. If missing or too damaged to assess, measure the interior floor at the bottom wire frame for accurate sizing.
Test Tray Removal Clearance
How smoothly does the tray clear the crate frame as you pull it out?
Remove the existing tray before measuring; this gives you access to the interior floor and lets you observe its exit path. Measure length and width at the bottom wire frame, where the tray rests, not higher on the crate, where dimensions may widen. Aim for a replacement about ¼ inch smaller than those floor measurements in both directions, so it can slide in and out smoothly.
If you still have the old tray, measure its flat floor and lip height; sellers may count the lip in listed dimensions. Before ordering, check the replacement’s published measurements against your crate model or old tray. Nominal crate sizes alone don’t confirm clearance, so compare actual dimensions and account for how the tray travels through the frame.
Resolve Bent Crate Wires
Before you measure, take a close look at the crate’s bottom wire frame for any bent or displaced wires—they can distort the tray opening and throw off your numbers. Carefully straighten displaced wires so your measurements reflect the actual interior floor. Then measure inside length and width at the bottom, keeping the tape flat on the wire frame—not across the wider top. Choose a tray about ¼ inch smaller than those floor dimensions for smooth insertion. If wires won’t straighten, or you’re unsure of the fit, give the supplier your crate’s brand, model, and interior measurements for sizing help before ordering; confirm the tray slides in smoothly.
| Check | Action |
|---|---|
| Bent wires | Straighten carefully |
| Floor | Measure inside length and width |
| Tray | Allow ¼-inch clearance |
Clean and Dry the Tray
Once the crate floor is straight, remove the tray and wash off dirt and residue, especially around the corners and raised lip.
Rinse the tray thoroughly, then check the edges for any remaining grit that could affect how it sits in the crate. Dry it completely with a clean towel, including the underside and lip. Even a thin film of water can make a tape measure slip or shift, producing inconsistent readings.
Set the dry tray on a flat, stable surface before measuring. Keep it level and don’t press down on the sides; pressure can distort a flexible tray and change its measured width. With the tray positioned, you can record its length and width from consistent edges, without dirt or moisture interfering accurately.
Conclusion
Once you’ve measured the crate’s interior floor, compare those dimensions with the replacement tray’s listed usable size—not its outside lip measurement alone. Check corner shape and edge height, then confirm the tray can slide past the door and any wire bends. If the crate frame is distorted, straighten it before ordering or choose a compatible model.
Clean and dry the old tray to verify its fit clues, then recheck your numbers before you buy.