How to Add Wheels to a Dog Crate for Easy Moving Around the House

You’ll move your dog crate more easily with properly rated casters attached to a sturdy base. Choose swivel wheels for tight spaces, and locking, larger wheels for parked crates or carpet.
Check each caster’s load rating against the combined weight of the crate and dog, and confirm the mounts fit. With your dog out, mark four corner plates, drill pilot holes, and secure them with bolts, washers, and locknuts where accessible.
Tighten hardware, test the empty crate slowly on carpet, and lock wheels when parked. More tips follow.
Choose Crate Wheel Type
Choose wheels based on how you’ll move and park the crate. If you’ll steer through tight hallways or around furniture, choose swivel casters so you can guide the crate in any direction. Locking wheels help hold it still when parked, especially on smooth bathroom tile.
For an extra-large, heavy kennel, check the load rating for each wheel. Choose a heavy-duty set rated to support both the crate and your dog; don’t rely on the combined rating of a set unless the manufacturer specifies it.
Match mounts to the frame or base, and measure attachment points before buying. Replacement sets commonly include two, four, or eight wheels; confirm the pack suits your crate. On carpet or uneven floors, larger wheels roll more readily than small casters.
Gather Tools and Materials
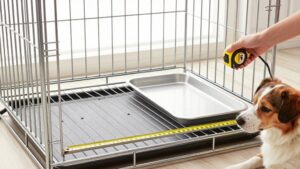
Before buying hardware, measure the crate’s base and note its frame or attachment points to confirm the casters or platform will fit.
Once you’ve chosen a wheel style, gather parts that match the crate’s weight and construction. Prepare these items before you begin:
- Four load-rated swivel casters; choose locking models if you need the crate to stay put.
- For a budget base, collect wooden slats, four wheels, and suitable nuts and bolts.
- Keep clamps or bolts for anchoring the kennel, plus a drill, matching bits, wrench, and tape measure.
Check components against measurements, and verify the platform hardware secures the crate without interfering with its frame. Don’t start until your drill bits fit the fasteners and the wheels match the load.
Step 1: Protect Nearby Flooring
To protect nearby flooring, use casters suited to the surface: larger wheels roll more easily over thick carpet, while swivel casters help you steer around tight spaces.
Check each caster’s load rating and keep the fully loaded crate within its limit. An overloaded wheel can fail and let the crate scrape or dent the floor. Inspect wheels for trapped hair, grit, or damage, and clean them before debris drags across the floor.
Move the crate slowly around thresholds and uneven spots; jolts can scratch the floor. Lock casters once you’ve placed the crate to prevent unwanted rolling and scuffs. Keep your route clear, and pause if a wheel catches, wobbles, or leaves a mark. Wipe away grit before moving, especially when you’re crossing hard floors or tile.
Step 2: Confirm Crate-Wheel Compatibility
Once you’ve considered floor protection, make sure the wheel kit fits your crate. Measure the base and frame, then compare those dimensions with the kit’s mounting points and product specifications. Check that the casters are made for your crate type: a set for wire cages may not fit a Midwest or ProSelect model. Confirm how many wheels the kit includes—sets may contain two, four, or eight—and whether your crate needs compatible sockets or stems.
Next, check the wheels’ rated capacity against the combined weight of your dog and crate. Choose a sufficient rating, especially for an extra-large kennel. Make sure the wheel size and material suit the crate’s base and your floors. Finally, confirm you can fit and reach any locking mechanism after installation, so you can secure the crate when it’s stationary.
Step 3: Mark the Mounting Holes
Set the crate on a flat, stable surface, then position each caster plate or bracket near a corner so the wheels will distribute the weight evenly.
Measure each gap between plates and mark every mounting-hole center with a pencil or fine marker. Keep the wheels evenly spaced, and check that each mark falls on a solid part of the crate base, not thin wire. Slide the removable tray in and out to confirm the planned wheel positions won’t block it.
Before drilling, recheck spacing and alignment, then compare your marks with the caster’s pattern. If you’re using a wooden platform, transfer holes from each plate to the slats, leaving edge clearance for secure fastening. Confirm points land on solid material and won’t block the tray.
Step 4: Install Wheel Mounting Plates
Choose mounting plates and casters rated for the combined weight of the crate and dog, and make sure each plate fits the crate’s base or frame.
Position four plates near the corners to create a stable platform. Use the hole marks from the previous step as guides, and drill pilot holes sized for the specified fasteners. Stop before the bit penetrates the crate base to avoid damaging it.
Attach each plate with bolts, washers, and locknuts wherever you can reach the underside. Don’t rely on screws alone to carry a heavy, moving load. Check that every plate sits firmly against the frame and that each caster swivels freely without contacting the crate. Before placing the crate in its parking spot, lock all four wheels.
Step 5: Retighten Loose Mounting Bolts
After installing the casters, check their mounting bolts regularly, especially after moving the crate. Use a correctly sized wrench to tighten each bolt firmly, but don’t overtighten; excess force can damage the crate frame or wheel mount. Retighten bolts when the crate is empty and stable, so it won’t shift while you work.
Inspect any bolt that keeps loosening before using the wheels. Check its mounting plate and the crate frame for cracks, stripped threads, or damage. If you find a defect, don’t rely on that caster; repair or replace the damaged part.
After tightening, test that each wheel swivels freely and remains securely attached. Lock the wheels after moving the crate. If the base wobbles or a caster shifts, recheck its bolts.
Step 6: Wipe Crate Frame Clean
Before attaching wheels, remove your dog and the bedding, then wipe the crate frame and base with a damp cloth to clear away hair, dust, and debris. Pay attention to corners and lower bars, where shed hair often collects. Clean around each attachment point, since grit or debris can keep a wheel bracket or platform from sitting flush.
If you use cleaner, wipe away any residue, especially if the crate stays in a bathroom. Let the frame air-dry completely; trapped moisture can encourage rust. Before fitting anything, inspect the clean crate for loose joints, bent bars, or damaged attachment points. Don’t mount wheels if you find a defect; the crate may not sit securely. Use a dry cloth to confirm no damp spots remain.
Test the Wheels on Carpet
Test the loaded crate on a small carpeted area first, since thick carpet can make it harder to roll. Keep the crate loaded as it will be during normal use, and hold its frame securely. Push it slowly for a short distance, watching how the wheels contact the carpet. Notice whether they roll freely or sink into the pile; thick carpet may resist movement more than low-pile carpet.
Don’t pull sharply or let the crate gain speed. Keep your dog out of the crate during this test. Check that the crate stays stable and the wheels remain firmly attached as you move it. Larger wheels may cross carpet more easily than smaller ones. At the intended spot, stop the crate and lock the wheels.
Troubleshooting Wobbly Wheels
If the crate wobbles during a roll or when parked, stop and check the setup before using it again. Set it on a flat surface and confirm every wheel touches the floor; uneven flooring can imitate a faulty caster.
| Check | What to look for | Safe response |
|---|---|---|
| Fasteners | Loose bolts or nuts | Tighten securely |
| Wheel fit | Uneven mounting | Match crate base |
| Wooden base | Rigid platform | Secure wheels at corners |
| Wheel condition | Bent or damaged | Replace before use |
Check wheel fit and snug loose bolts or nuts. For a wooden platform, confirm a rigid base and secure corner placement. Lock casters after moving; replace bent or damaged wheels if wobbling persists. Keep your dog out until the crate sits steady again.
Lubricate Caster Swivels
When a caster swivels stiffly or squeaks, clear hair and debris from its joint before applying a small amount of pet-safe lubricant to the swivel bearing and axle.
Rotate the wheel and swivel the caster in several directions to spread lubricant through the joint. Wipe away excess with a clean cloth. Keep lubricant off surfaces your dog may lick, and follow the product label’s safety instructions.
Apply it carefully at the joint, not across the crate, and let any residue dry as directed before your dog returns to the room after the area is safe. Check swivels regularly, but lubricate again only when they become noisy or difficult to turn. This helps keep movement smooth without leaving residue where your dog can reach it.
Conclusion
Before moving your dog’s crate, confirm every wheel is securely fastened and swivels smoothly. Test it slowly on carpet and hard flooring, keeping your dog safely out of the crate during checks. If the crate rocks, a wheel binds, or a fastener loosens, stop and fix the problem before rolling it again. Protect nearby floors, avoid overloading the crate, and inspect the hardware regularly.
A careful setup helps you move the crate around your home with greater control and confidence.