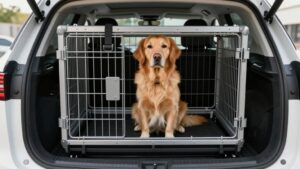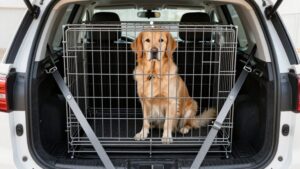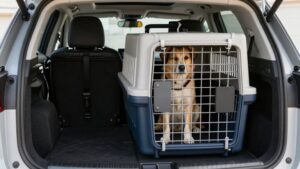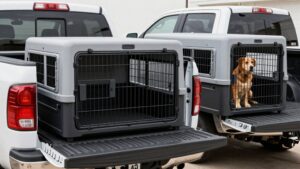
How to Secure a Dog Crate in an SUV Cargo Area With Tie-Down Straps
Measure the cargo width between wheel wells, floor length, and lowest height; confirm the crate fits flat with the hatch closed.
Inspect anchors, latch, straps, and hardware; reject damage. Lay a non-slip mat beneath the crate.
Attach straps from sturdy crate-frame points to sound vehicle anchors, securing all four corners when possible. Tighten evenly without bending the crate.
Stow loose webbing and handles safely. Push and pull the crate, then test and recheck before driving.
A few added checks can help keep trips secure.
SUV Cargo Area Measurements
Measure the SUV cargo area before choosing or loading a crate. Measure width between wheel wells; they can narrow usable floor space. Measure floor length from the rear hatch to the back of the second-row seats with the seats in the position you’ll use.
Check cargo-area height at its lowest point, accounting for a sloped roofline and hatch clearance. Measure the crate’s outside dimensions, then confirm it sits flat and leaves room for the hatch to close. Allow space for strap routing and hardware, and make sure the crate can sit centered without blocking necessary cargo-area access. Use a tape measure, record each dimension, and compare the crate’s measurements with the smallest available clearance. Don’t rely on nominal cargo volume; a crate that barely fits may prevent safe closure or access during normal travel.
Inspect Cargo Anchor Points
Once you’ve confirmed the crate fits, locate the SUV’s built-in cargo tie-down loops or anchor points before loading it. Inspect every point before you set the crate in place. Look for damage, looseness, or corrosion; skip any anchor that seems compromised. Choose locations that let straps reach the crate without crossing sharp edges or blocking its door.
- Check each anchor for movement, rust, cracks, or bent hardware.
- Position the crate centered and flat between usable points.
- Keep strap paths clear of sharp edges and door clearance.
- If built-in points won’t work, use properly fitted soft loops around a secure vehicle attachment point.
- Never attach straps to an unverified hook or trim piece.
Your anchors must hold securely without pulling the crate out of shape.
Step 1: Check the Crate Door Latch
Before securing the crate, close the door and make sure the latch engages firmly.
Inspect the latch for bends, cracks, looseness, or anything that could block it, such as bedding. Close it and give the latched door a gentle tug. It shouldn’t swing open. Move the crate and confirm the door stays shut.
If the latch feels loose, looks damaged, or fails to catch, address the problem first; don’t rely on straps to hold the door closed. Tie-down straps secure the crate, but they can’t replace a working latch.
Recheck the latch before each trip and after you adjust the crate or straps. Check that bedding hasn’t shifted into the latch area, and test closure. Start the drive only when the door stays latched.
Step 2: Lay Down a Non-Slip Mat
Lay a non-slip mat flat on the cargo-area floor, then center the crate on it so the base sits evenly and stays stable. Choose a mat that covers the crate’s footprint and lies flat beneath it. Smooth it before you set down the crate; folded edges or curled corners can tilt the base and undermine stability.
After positioning the crate, check that its base rests evenly, without rocking or shifting under light hand pressure. The mat helps limit sliding across the cargo floor, but it isn’t a restraint and can’t secure the crate during a sudden stop or turn. Treat it only as added grip, not as a substitute for securing the crate to the vehicle. Once the straps are tightened, recheck carefully that both mat and crate remain in place.
Step 3: Fasten Crate to Anchors
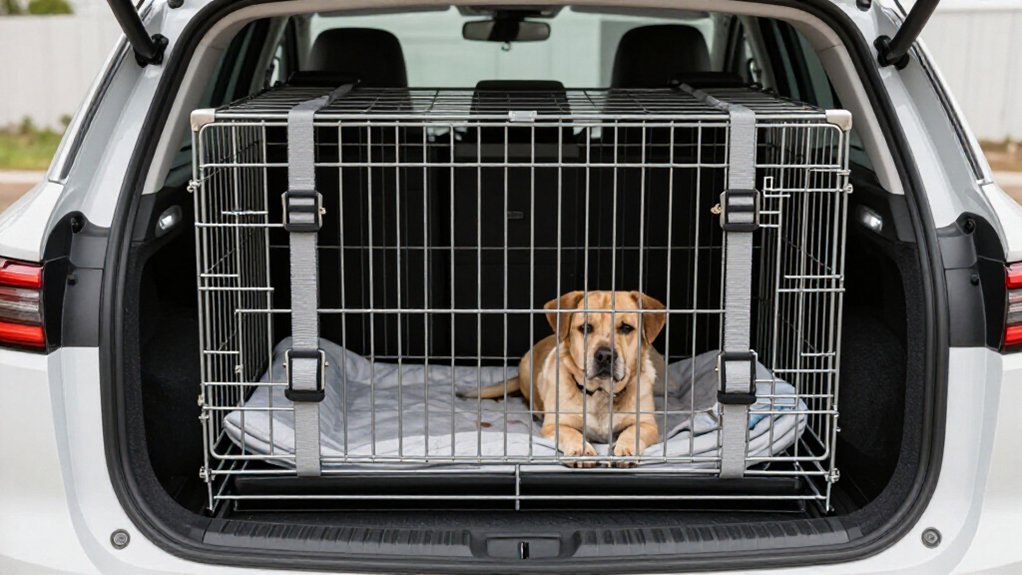
Center the crate flat in the cargo area, then fasten each tie-down strap between a sturdy point on the crate and a suitable vehicle anchor. Use built-in cargo hooks or loops designed for securing loads; don’t attach straps to trim, seatbacks, or other weak parts. If the vehicle lacks a suitable direct anchor, add soft loops and secure all four crate corners.
Choose 1-inch-by-6-foot straps for a small or medium crate; a larger crate may need 1-inch-by-10-foot straps for adequate reach.
Tighten each ratchet gradually and evenly so the crate can’t slide or tip during a sudden stop. Stop when it’s stable; excessive tension can bend or distort the crate. Before driving, check every hook and loop for firm attachment, then gently test the crate from several sides. Keep loose cargo clear so it can’t shift against the crate.
Step 4: Thread Straps Through Crate Frame
Thread each strap through a sturdy opening in the crate frame, keeping it clear of doors, latches, and weak panels. With the crate flat and centered in your SUV cargo area, route each strap along the frame. If the crate lacks suitable openings, use soft loops around its frame; don’t wrap straps around a door or latch.
Choose straps that reach without routing problems: a one-inch-by-six-foot strap suits a small-to-medium crate, while a one-inch-by-ten-foot strap gives a larger crate extra reach. Connect each end to a secure cargo-area anchor point. Use straps at all four corners when possible to limit forward, sideways, and tipping movement.
Tighten each ratchet evenly until the crate is snug and cannot shift; avoid force that bends or distorts the frame.
Step 5: Test Strap Tension by Hand
Once all tie-downs are tight, push and pull the crate firmly by hand. Watch for sliding, tipping, or noticeable shifting. The crate should stay planted in the cargo area.
Check each strap across four corners. You should feel firm tension along every strap, with no slack that could let the crate move during turns or over bumps. Tighten straps evenly until the crate sits snugly. Don’t pull so hard that you bend or damage its frame.
After securing all four corners, recheck every strap. Tightening one can loosen another, so don’t assume the first check still holds. Repeat the hand test after adjustments. If the crate moves under a firm push or pull, reposition or retighten the straps before you drive.
Step 6: Stow Ratchet Handles Safely
After tightening each strap, fold and secure the loose webbing so it can’t dangle near your dog or the crate door. Keep each ratchet handle closed and stow it flat against the strap or cargo-area wall. This keeps it from swinging loose while you drive.
Position the handle away from the crate’s ventilation openings and door, and clear of surfaces where it could rub or snag. Don’t leave it where cargo can press it and accidentally release or damage the tie-down. Check that your dog can’t reach either the handle or any strap tail.
After tightening, inspect the stowage again; if webbing has shifted or a handle has moved, reposition and secure it before you travel. Confirm the handle stays closed throughout.
Verify Crate Stability During Braking
Before driving, push the tightened crate firmly in several directions; it should stay centered without sliding, tipping, or rocking. Then inspect each strap: it must feel snug, attach to a secure cargo-area anchor, and show no slack that could let the crate shift when you brake. Keep tension firm, not excessive; overtightening can distort the crate and weaken its fit.
Once the hand check passes, test the setup in a safe, empty area. Drive slowly and brake gently, watching for movement. If the crate shifts, stop, reposition it, and retighten the straps before testing again. Don’t continue until it remains stable under gentle braking. Recheck strap tension and crate position before setting off on your trip, since loading or handling may have loosened a connection.
Diagnose Crate Rattle During Turns
Even if the crate stays put under gentle braking, a rattle during turns may mean it’s shifting sideways. Park safely and watch the crate as you gently check its position. It should sit flat, centered, and snug against its tie-downs. Check hooks or soft loops and vehicle anchors for looseness; tighten straps evenly with the ratchet until the crate cannot slide. A non-slip mat can reduce movement, but don’t tighten so hard that you bend or distort the crate.
| What you see | Likely cause | Action |
|---|---|---|
| Rattle on turns | Sideways shift | Recenter crate |
| Uneven tension | Slack strap | Retighten evenly |
If movement persists, reassess strap routing and anchor points; secure all four corners with suitable anchors or soft loops. Recheck tension and movement before driving again.
Inspect Straps for Fraying
Inspect every tie-down strap before each trip, running your fingers along its full length to check for fraying, cuts, worn stitching, or other damage. Inspect the ratchet, hooks, and attachment points too. Look for cracks, bends, corrosion, or loose parts; damaged hardware can fail under load just like worn webbing. Don’t use a strap with damaged material or hardware, because failure could let the crate shift while you’re driving. Replace worn straps instead of trying to fix them with knots, tape, or makeshift stitching.
After you tighten the straps, check the webbing again. Make sure it lies flat without twists and doesn’t rub against a sharp edge. Reposition the strap if needed. Check each strap before loading your dog.
Conclusion
Before you drive, confirm the crate fits the cargo area, its door latches securely, and each strap connects to a sound anchor without twists or slack. Press the crate from each side; it shouldn’t slide or tip. Keep ratchet handles stowed, then listen for movement during a test drive, especially through turns and braking.
If you hear rattling or find fraying, stop and correct the setup before continuing. Recheck the crate and straps before every trip.